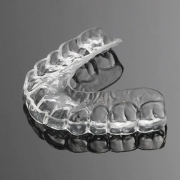
Is Invisalign the Right Orthodontic Treatment Option for Your Teeth?
Have you been exploring ways to correct crooked teeth? You might have come across Invisalign as an option. At Bulleigh Orthodontics, our orthodontists in Shawnee and Overland Park, KS, provide this treatment if you’re deemed a good candidate. Let’s go over how to know if Invisalign is the most suitable solution for your teeth.
How Severe Is Your Orthodontic Problem?
Do you have a mild or moderate bite issue or crooked teeth? Invisalign can treat these kinds of problems. If you have a more severe issue, though, we may need to discuss other treatment approaches with you, such as braces.
Are You Willing to Wear Aligners Most of the Day?
You’ll need to keep your aligners on your teeth for a minimum of 20 hours a day during treatment. That’s a big commitment, but keep in mind that you can remove them for short periods of time, such as when you’re going to eat or brush your teeth.
How Quickly Do You Want Straighter Teeth?
You can’t rush this type of treatment in general, but Invisalign typically takes a shorter amount of time than braces. It can take a couple of years for braces to straighten teeth, while aligners may work within several months.
Do You Want Fewer Appointments?
Invisalign is a great option when you want to keep the number of orthodontic visits down. You’ll need to see us every so often to get new aligners, but this treatment involves fewer visits overall.
Schedule an Appointment to See if Invisalign Is Right for You!
Wondering if you should go with this treatment for your teeth? Our orthodontists at Bulleigh Orthodontics can help you decide. We offer Invisalign in Shawnee and Overland Park, KS, for patients who are suitable candidates for this orthodontic solution.


